A2 Wars

A long time ago,


In a galaxy far, far away,


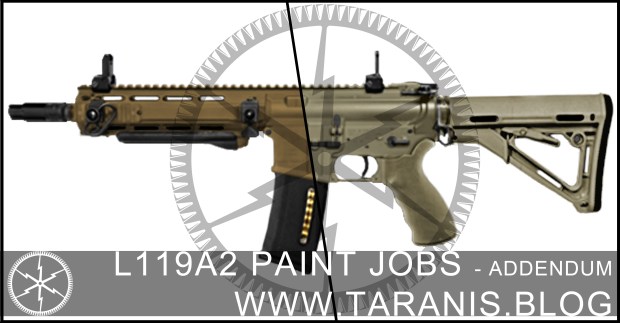
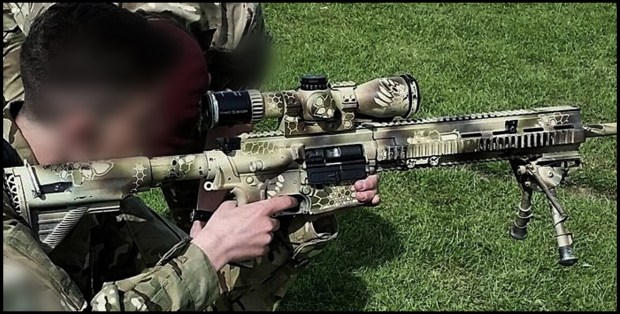
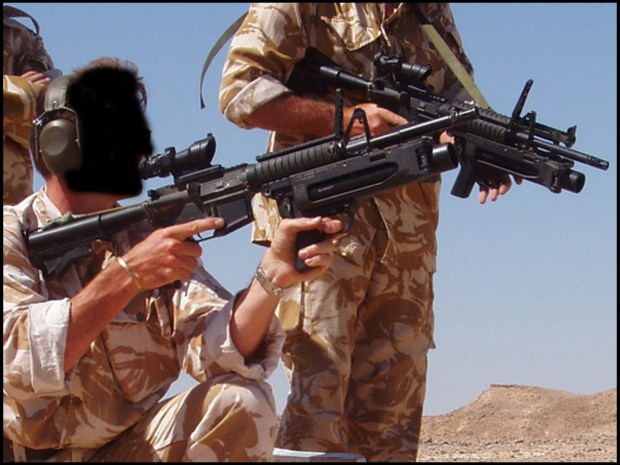
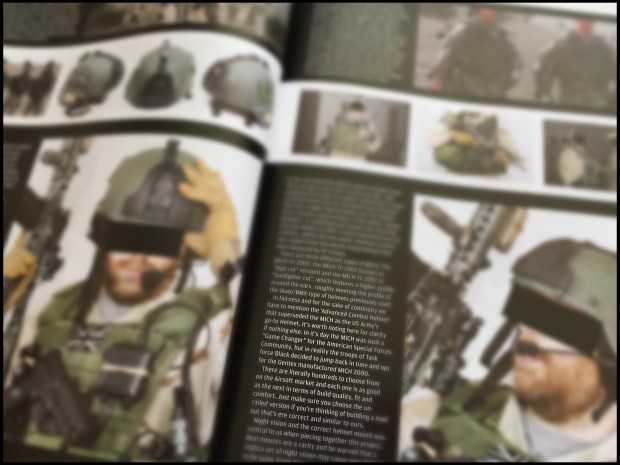
There were only L119A1 builds…

The recently completed L119 Owners Club build competition (Check out The Reptile House Blog’s post here) has given me a little opportunity to take stock on where the L119 build scene is.  The incredibly high standard of entries and the care and craft of the builds was staggering, and judging it alongside Rich and Andy was a fun and interesting experience.

But casting my mind back to when I first started on the L119 build route, it was a different story…  This one is long, as ever, TL:RD at the bottom.

G&P was probably the ‘standard’ build, they were good solid AEGs, and you could fit them out with the following:

–  A G&P C8A1 body (This had the Diemaco badge but ‘C8’ makings), or a Dragon Red L119A1 marked body.

–  A Guarder Storm Grip’

–  A VFC PEQ-15 was the best about – before the FMA and later Element LA5’s were available.  G&P PEQ-2s were also in vogue.

– A repro Surefire flash hider with a murky OEM.

– A PerrMike suppressor.  These suppressors were initially somewhat rough and ready but the later generations were solid, well build and surprisingly well detailed.  They directly threaded onto a barrel, with flushed or recessed options.  No trades however, the weld line was a simple raised ring about the body.

– If you were really lucky you might snag a real Diemaco DIS or even a real UKSF spec KAC RAS.

– When building a SFW upper you would want an exceptionally sought after Army Code reinforced front sight and either Pro Arms or Perr Mike barrel extension.  If you couldn’t source these it was a milliput job.

Obviously there were other options, PTWs with Prime receivers and GBBRs, a host of creative options and work arounds.  There was a veritable cottage industry which was spearheaded  by Mike P in providing enthusiasts with parts, and Zeroin and UKAZ provided build threads which were in essence the precursor to the Facebook groups of today.

Later Warlord and Begadi sprang up, LA5s were cloned and more accessible engraving lead to a profusion in the quality and breadth of builds.  I find it hard to quantify this looking back, but public domain reference material and common knowledge seemed far scanter too.

Taranis Picture Template - A2 Wars Panoptes 1

Panopte’s excellent builds and iconic photography really inspired my later builds.

My first build was a G&P L119A1 with C8 marked body, I bought it half built from a forum and finished it off myself and was immensely proud.  Looking back it wasn’t a terrible build, but it could have been far better – it was certainly far better than my kits were back then.

My second attempt was the TM NGRS L119A1 I still consider my primary today, but it has been revised and tweaked hugely over the years.  Now I am building an NGRS A2 and GHK A2, both somewhat slowed by the buying of a house which needed rather a lot of work.

This quick history lesson from when I started on the impression scene is just by way of illustration of how far the scene has come.  Back then no one cared hugely if your trades said C8 or L119 (although the latter did have some cache), no one had the correct buffer tube or receiver extension nut, pretty much no one had receiver mods, no one had the correct stickers on their PEQ-15 and while real parts were far from unheard of, they weren’t as prevalent.  I am sure there were developments and proto builds from times before I was involved in the scene, a few of the well known names from back then are still about, if not quite as visible, although many have drifted away.

Taranis Picture Template - A2 Wars Panoptes 2

The fact the trades said ‘C8A1’ wasn’t a big thing, so long as you had the ‘D’…

This is not nostalgia for a time of lower standards, nor a pat on the back for advancing from builds which by today’s standards might be considered crude.  Rather it is related partly to let people who joined the scene later know just a smidge about how it used to be, and also to give a sense of perspective.

So back to the present, and the staggering quality of the entries into the L119 Owners Competition – evidence of how the scene now has a laser focus, and as one item is sourced and honed as a replica attention moves onto the next how things can be improved, how the envelope of what can be done with a toy gun is pushed.  The hobby for people who build impression builds isn’t really about airsoft, it’s an exercise in creativity, research and craft which is somewhat tangential in its geekery.  You can  certainly look at the winners of the competition as examples of these high standards, but it might be even more informative to look at the staggeringly good builds which missed out, not to mention the judge’s builds – Rich and Andy, had they not agreed to judge, would both have been among the front runners.

This development of the hobby, the desire for accurate, beautiful, well researched builds is great, and a testament to the community, and it’s not so much that the builds are not better so much as the older builds laid the groundwork and sparked the interest in L119s.

It’s all a very cool and exciting place to be – but this brings me onto the real point of this article, after a very long meandering preamble:

Tribalism and Elitism.

This is nothing new – anyone who remembers the old forums also remembers the savage arguments, pissing contests, locked threads and silliness which came with them.  The fact that via realsim events and impression groups more contributors actually know and have met each other has helped alleviate the issue somewhat, as does the fact Facebook is largely real names, it certainly isn’t as anonymous as forum handles.  The issue has far from disappeared however.

Now there are different approaches to building replicas, and people follow one, or a combination of these approaches.  Anything from directly cloning a reference picture, to putting your own spin on a build but using commonly referenced parts, to creative unique builds with a variety of accessories, so long as they’ve been pictured at least once.  The Reptile House Blog wrote a piece trying to coin terms for these different approachesand while I might not be universally in line with every part of the article, it’s an astute attempt to categorise the common approaches.  Adherents to these various methodologies do occasionally have a tendency to dismiss the other though, to draw a line and decide on what is and is not a valid approach.

This can get further rarefied if you begin to define various features as the hallmarks of a valid build.  Such as use of real parts, or maybe it should be GBBR since electric rifles (AEGs/PTWs/NGRS) are all far more sterile in terms of operation and ‘feel’. ..  Such delineation between valid and non valid builds very much about gatekeeping and trying to discredit other approaches, and is often a matter of very subjective personal preference, and can seem arbitrary.

My main bug-bear which the title makes an allusion to is the idea that an L119A2 replica should have a true monolithic receiver to be a valid build.  A monolithic ‘integrated upper receiver’ is a hallmark of the L119A2, true; but so is firing 5.56, being a certain weight, being operated in a certain way, having a QD suppressor etc  etc…  The only way you have a truly valid build is by signing up, passing selection and being issued a true L119A2 out the armoury – anything else is a matter of interpretation and is part of the hobby.

I tend to view the validity of builds as a sliding scale, at one end you have the poorly researched monstrosity which you might only know is meant to be an L119 because the owner told you, and at the other you have the absolutely flawless build upon which the owner has lavished no end of attention, care and money.

Most people are trying to push their builds from one end toward the other, within the limitations of their budget, platform of choice and personal commitment to it – some people want their build to stand up to scrutiny from centimetres away under carefully composed photos, others want their builds to look the part from a few feet back when putting their boot through a door – and while one approach is undoubtedly more accurate than another, both are valid.  I think most people into this niche segment of the hobby can if they are honest decide when a build is credible enough to be deemed a fair shot.  It might not pay to be too scientific about this but I tend to look at these items:

–  Is the build recognisable?  This is pretty simple, looking at it, does it tick enough boxes that you know what it is meant to be, even it might not be all the way there.

–  Does it stand up from a few feet away?  Or alternatively the ‘squint test’…  If the build were photographed in a semi believable setting, at a passable but not particularly great resolution, would it be instantaneously obvious it wasn’t real, or would it bear alittle bit of examination?

–  Has a degree of care been taken to make is accurate?   By this I mean if buying a suppressor for instance, have they gone for one of the several Surefire replicas, or have they gone for a KAC or AAC repro on ebay.  It’s about the right choices being made where things have been acquired.

If it ticks those items, it’s a valid build, and the question is just how far along the scale of geekery and expense it can be pushed – how good can it be made?

So there are two options available for an L119A2 build, HAO and Angry Gun – and sadly is seems many seem to fall almost tribally into one or the other.  At worst they dismiss the other approach:

“Angry Gun rails aren’t monolithic so anything using them isn’t a real L119A2 build, they cannot be redeemed and only the plebs who don’t care about accurate builds use them”

Or

“HAO builds are for people with too much money who use unreliable sewing machines and invariably make hipster builds”

Both the above are huge caricatures, granted, but I am sure people can recognise there is a degree to which both attitudes are present in the community – although I think I have probably seen more of the former.   Every expression of something that vaguely fits the above template also gets the backs of those it is directed at up and exacerbates the issue as they swing more toward it’s equally unhelpful mirror image.

So a reflection upon the two A2 options about.
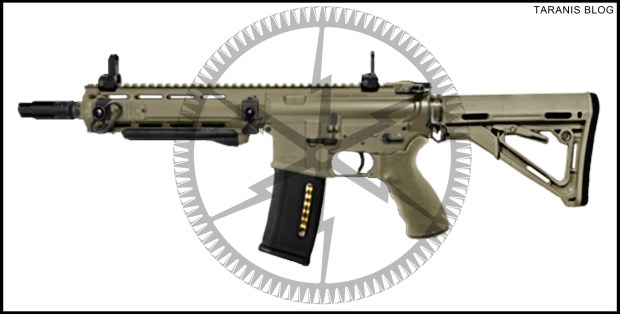
Taranis Picture Template - A2 Wars HAO

Picture Credit: HAO

HAO produce an upper and a full L119A2 kit which features a monolithic integrated upper receiver which is about as close as it’s possible to get to the real thing.  The kit is only available for PTWs, although future MWS and possible GHK released have been rumoured.

Their A2 offerings are beautiful creations with an exceptionally high attention to detail which meshes with the obsessive attitudes of many L119 builders.  The HAO kits have a substantial price tag before you even factor in a PTW, which is unsurprising given the quality of parts are the fact they can’t shift that many units comparatively, smaller more exclusive runs means higher prices.

The HAO upper receiver was first released in 2018, with the first batch released, while still an excellent iteration, having a few inaccuracies and details that weren’t quite there.   These were pointed out by a number of enthusiasts, including myself, privately – while I never heard anything back from HAO the revised release addressed all the issues that I could see, and although I don’t own one since I am not a PTW user, the pictures and reviews from respected sources suggest it is as near flawless as possible.  It is a triumph and I am disappointed they don’t currently produce them for a platform I use.

I must confess some discomfort with the ‘Beta Release’ moniker which was applied to the release of the first batch retroactively, only after issues were identified, but regardless the product on sale today is a testament to a craft and no compromise approach which certainly finds a home in the L119 build community.  One of the disappointments with the HAO A2 products as it stands is simply that they are not available for more platforms, in particular demand in the L119 build community are favourites of the Marui NGRS and GHK – these are particularly popular on the realsim and impression scenes.  It’s not really worth worrying over however, HAO will build for the platforms they want and it doesn’t remove from what is possible with the PTW for those who use them.

It’s also worth noting HAO produce a number of accessories and smaller parts which are compatible with different platforms, either with some small modification or a straight fit, a variety of which I have used in my builds and which are all great quality.

Taranis Picture Template - A2 Wars Ag

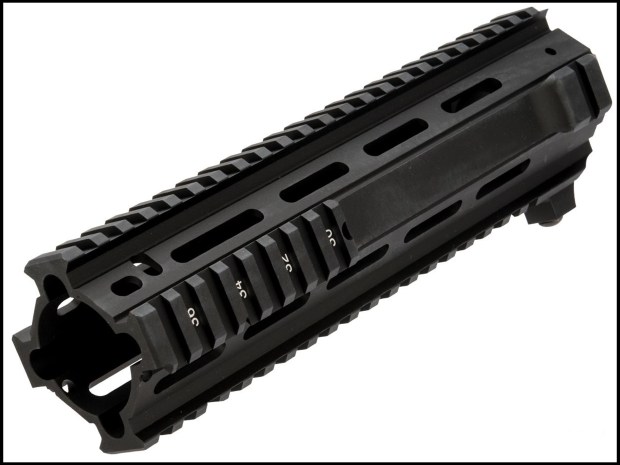
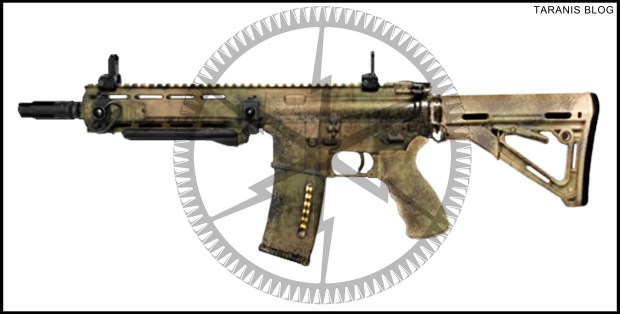
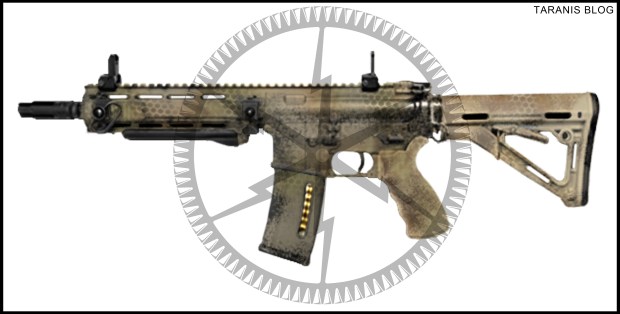
Picture Credit: Angry Gun/Evike

Angry Gun, by contrast, produce the L119A2 rail – which is fitted like a normal airsoft rail to the upper receiver of your choice via a hidden fixing system to allows L119A2 builds on almost any platform.  This creative approach has allowed a profusion of A2 builds on people’s favourite systems, and they have been able to leverage economies of scale to get the price to a fairly accessible level, certainly if you’re building any L119 you have to accept it will be somewhat costly – the choice is between ‘quite expensive’ and ‘eyewateringly expensive’.  Angry Gun are also the only option for the long 15.7in upper A2.

I was involved somewhat in the development of the Angry Gun rail, although I did not profit from it other than receiving a prototype rail free for comment and as a ‘thank you’, every subsequent AG rail I have bought I have done at full price.  When I received the prototype Angry Gun rail I sent off a list of comments on them, privately, as I did of my observations on the HAO rail, some of which were acted on, but not all.  As I understand it the cost of some of the modifications would have pushed the overall price of the product beyond where they wanted it to be.  The Angry Gun, as you would expect with the different price points, market  and approach to development is not as accurate as the HAO A2 (monolithic aside).

The approach of treating the A2 as a rail for maximum volume, maximum flexibility and a more controlled cost is that you end up with some interface issues.  Structurally a solid bit of material will be stronger than an interface mechanism, and while I have had no issues with wobble on my AG rails, by their nature they will not be as resilient.

Furthermore the approach leads to a ‘double tooth’ issue in the RIS rail at the top, which while it can be covered with an optic, is a draw back.  The RIS numbering and receiver finish will also not be perfectly integrated, so cerakote or painting may be preferable.  Finally the receiver will require machining and milliput mods to get it to the true A2 shape which comes ‘as standard’ on a monolithic upper.

The L119 build community has mobilised to experiment and refine approaches to mitigate these issues as much as possible, but they are worth noting.

So my clickbait picture and title notwithstanding, I am going to state simply that I believe both approaches to building an A2 are valid, and both have produced some gorgeous builds, with the L119 Owners Club competition one of many examples of this, but far from the only one.  Both approaches have lead to intriguing innovations, surprising creativity and most importantly fun and satisfaction for their owners – which is what it is all about, beside looking cool.

I would caution that if people who start on the impression build path are told the only option to produce something credible is a to drop at least a couple of thousand into a build to just cover off the basics, they won’t bother.  They will either continue their builds without engaging with the wider community, and both will be poorer for it, or they will find something else to build.  Either way the impression scene is starved of new members.  I know if when I bought my partially build G&P L119A1 about nine years ago now I had been told I would need to have spent the amount I have now spent on my NGRS L119A1, I would never have bothered and never have produced a build I am now very proud of.

Furthermore as I alluded to earlier, drawing a line of validity on an arbitrary feature is not only unwise for the reasons I have listed but is also an approach which can be used to exclude your build on a variety of equally arbitrary criteria.

To be clear this is not an argument for lower standards per say, I am aware I run a group which is notorious for having high standards and probably taking builds too seriously.  I believe great builds should be rightly praised for how good they are – but that dismissing something as not valid should be based on less arbitrary criteria than the product used its construction and more on the more subjective quality is shows.  Because that build will almost certainly progress and I am sure almost all of the people with great builds about today has a photo or two of a ‘proto’ version somewhere.

It is also worth noting that without the early L119 products, including Army Code’s and PerrMike’s, we might not have had the market for Warlord or Begadi, we then might not have had the community of committed builders to make either the Angry Gun rail or HAO set or any of the various 556SA suppressor replicas at all viable.  The suffocation of a scene down into a small handful, with high barriers to entry in terms of both time and money will eventually lead to the withdrawal of any market support.  At the moment L119 builds remain a still under served market, but it’s only by keeping the community going that that remains the case.

So at the end of my meandering reflections on an element of the scene I have been musing upon a while, I think it worth reiterating that it is note a huge community, and there’s some great stuff that goes on within it.  Occasional arguments crop up about all sorts of things, but HAO v AG is certainly one of those which really isn’t worth is.

TL:DR

Give peace a chance…

So I am back after over a year away from the blog – and while I am not going to be a prolific poster, I am not going to leave it so long again.  In case anyone cares I’ve been abit preoccupied with a promotion at work and having bought a first house that was very much a ‘fixer upper’.  In that time I have half finished a handful of articles, so I might look at finishing off a couple more.

All pictures have been used without permission.  I hope the respective owners will be okay with such use in light of the intent behind the article and the on balance overwhelmingly positive views on all the products and builds pictured.

L119A2 Paint Jobs – Addendum

As seems to be the case when publishing articles about a subject, new information has come to light on elements the L119A2 paint jobs article.  Often the article provokes comments and discussion and a few more things are unearthed or information conveyed subsequently.

Taranis Picture Template - Narrow - L119A2 Paint 8 (Large)

It seems the coating I attributed to being ‘Cerakote’ in the article is probably FDE Duracoat, a coating which is not dissimilar, but does not seem to require baking in the same way.  It also seems the colour tone used in the mock up, which matched the reference image I had, was too dark, and true colour is closer to FDE than Coyote Brown.  All other elements of the article, including those on the Signals L119A2s, seem to be correct.

The original article has been revised, and a new visual substituted (See above), however I felt when changing some of the key details of an article after publication it was worth highlighting it.


L119A2 Paint Jobs

Throughout its service with UKSF, the L119A1 has been painted all sorts of colours depending on theatre, resources and the preferences of individual operators, from carefully put together and almost artistic patterns to (more usually) rough and ready application of paint to break up the outline of the weapon.

The L119A2 it seems is no different, with approximately half of those seen in use with UKSF so far having been painted a variety of patterns.

There’s certainly nothing wrong with leaving them unpainted, as issued, but some guys just love painting their rifles, and others won’t particularly like the ‘two-tone’ effect the tan/dark earth parts lend the L119A2.

Taranis Picture Template - Narrow - L119A2 Paint 4

This article will try and draw out broad themes with the painting of weapons, and usual caveats apply regarding the still small sample sizes in terms of L119A2 reference, although it is getting better in that regard.  It is also worth noting that while I will mention general themes here, painting of weapons is hugely individual, and will remain so in most cases.  Colour choices, method, and level of prep will differ between users, and many building replicas see painting as a way to exercise another level of creativity, or make builds appear more authentic.

Yet again photoshop has been deployed to illustrate things which are shown in images I have undertaken not to share.  Photoshop has also helped add a degree of clarity to the patterns shown, and comparison between them, which might otherwise be lacking.

Shades of tan and brown are still predominant, as with the L119A1, although there is perhaps abit more green now added to paint jobs, possibly a reflection of focus slowly shifting away from sandy theatre’s, although it is evidently not far.

Generally I have found the below to be useful considerations when painting anything.

  • Consider what not to paint.  Mask off areas of the item which you do not wish to paint – it is up to you how precisely or roughly you do so, that will depend somewhat on the type of paint job you want to deliver, but as a general rule, don’t paint flash hiders, bolts and triggers – certainly don’t paint lenses on lights and optics.  Consider which accessories you do and don’t want to paint, not painting an accessory or even an item of furniture on an otherwise painted gun can give it a ‘dropped in’ look.  Painting accessories on the weapon (so there are gaps in the rails when they’re removed) is also another style which can give a particular look – it’s been seen commonly, but it’s also obvious some guys remove every accessory and paint separately.  Apparently this may in part be to do with ensuring there is no paint on rails where accessories need to be zeroed, although is has also been seen on flashlight and grip attachment points, so in some cases it must simply be guys not bothering, or wanting, to remove accessories before painting.
  • Personally I always use a range of paints from different manufacturers to get the colours I want – I think using entirely Krylon can often seem very ‘airsoft’.  Krylon,  Fosco, Tamiya and NFM are all good choices.  Paints used by the real guys will be from various sources, and might not look too much like the small range at a local airsoft shop.  Don’t go overboard with 10 different colours though, no one has time to do that for real.
  • I always like dark brown Krylon for a base coat, and will have mid earth and tan colours over, then darker browns and a green to finish off.  I tend to suggest avoiding light base coats, and don’t overuse tan Krylon.
  • Don’t do the ‘dusty look’ – it never looks good, it is always too consistent, it is fine to have a weapon which has had multiple paint jobs chipped and flaked off, but real operators don’t let their weapon look like it’s been through a cement mixer.
  • Unlike many people I am not against artificially wearing a paint job, even if you airsoft religiously you likely won’t put a rifle through a fraction of the use a military rifle gets, so to avoid it all looking too pristine, artificial wear can be useful.  The problem is that almost everyone does artificial wear badly.  Paintjobs wear in a variety of ways, surfaces which are touched constantly in the operation or cleaning of the weapon will wear down naturally.  Flat surfaces will often scratch, exposed ridges will chip – some in more protected areas will remain untouched – good artificial wear will replicate all of them, and consider where the wear will realistically occur.  Don’t use white spirit or anything to wear a paint job.  Handle it when the paint has only just dried (not when it is tacky, or it will leave smears and marks) – run through a few drills, rub the paint where you usually touch and hold the weapon, dabbing with paint stripper gel can make it look like an area has naturally worn, but it’s strong stuff, a few dabs with a gel soaked J-cloth, then a minute or so later wiping it off with a dry one often works well.  A kitchen scourer is often good at scuffing and knocking paint at exposed areas, the edges or rails, mag wells, projections, edges of iron sights, sling mounts etc before paint is fully dry.  Don’t go knocking or scuffing it from areas which wouldn’t normally get a decent amount of abuse.  A few scratchs and chips to dry but not completely cured paint can be achieved using a plastic ruler, don’t use anything too hard since you don’t want to scratch the surface below, and concentrate here on flatter surfaces like on the receiver where it might scrap against a branch or rock.  Also don’t be too concerned about everywhere on a rifle being equally worn – consistency will look artificial.

The below images have been based on real reference photos – not every spray and dab is replicated, but the general themes of the various paint jobs are featured in reference photos.

Please ignore the choice of accessories on the rifles, and whether they are painted or not.  With the exception of the rubber hand guard and flash hider, in reality the mags/BUIS/sling mounts etc could be painted or not, depending on preference.  The choice of accessories is simply what was on the base image I worked from.

The first is a simple 3/4 colour pattern using a couple of tan/earth colours, a darker brown, and a mid green, with no major use of any stencils or scrims.

Taranis Picture Template - Narrow - L119A2 Paint 6

The second shows a lighter tan scheme, with darker brown and/or green applied in splashes of spray through a scrim.  Army laundry bags give a great honeycomb pattern (my personal preference), while scrim scarfs will give a more rectangular ‘scale’ like pattern.

Taranis Picture Template - Narrow - L119A2 Paint 2

This is where things get a bit interesting, and different from L119A1s – L119A2s have been seen sporting Kryptek inspired paint jobs.  This seems to be a combination of more traditional paint techniques over stuck on Kryptek stencils, as sold by Ballistic Designs IOM via their website and Ebay.  These stencils are stuck down over the base colour you would want the pattern in, the paint job is continued over the top, and then finally the stencil stickers are peeled off to reveal the pattern below.  If going for this method, don’t overdo it, every inch of the weapon shouldn’t be the Kryptek pattern, just flashes of it.

Taranis Picture Template - Narrow - L119A2 Paint 3

I’m unable to share pictures of L119A2s with Krypek paint jobs, but the below SFSG HK417 gives an indication.  This one looks so sharp I initially thought it was a hydrodip, although it is in fact paint, the A2s seen appear a little less striking.  The method certainly appears to be in vogue among the real guys though, and can look awesome.

Taranis Picture Template - Kryptek.jpg

Finally, although not a spray job per say, Cerakote is something many use to finish receivers after having modifications made of engraving done, and it gives a thin, hard wearing and consistent surface finish.  Most often this is simply back to a black colour – however there is another option if doing a signals kit.

Taranis Picture Template - Narrow - L119A2 Paint 8 (Large)

Signallers attached to other UKSF elements from 18 Signal Regiment use L119A2s which have had their receivers duracoated FDE, with suppressors and optics also cerakoted.  Ergo grip and CTRs are retained in their stock colours, magazines appear to remain black, and pins, controls and sling plate are also black – the buffer tube and nut however seem to be coated.

This believed to be particular to signallers due to restrictions on painting their weapons, and so would represent a unique touch for those building signals impressions.

This article was edited for after new information came to light post publication.  Check out the addendum to see what changed.

HAO L119A2 Upper Series on The Reptile House Blog

The long anticipated HAO L119A2 Upper has been released, and Rich at The Reptile House was provided a Beta release of the upper to test and review, which has provided a slew of fascinating articles.  Check them out below:

Part 1        Part 2         Part 3        Part 4         Part 5        Part 6

I first blogged about the HAO L119A2 upper some time ago, and I’m pleased to see it released, I know many who had been eagerly awaiting it.  From the photos and articles pertaining to it, it looks an excellent product, and certainly one which would interest me greatly were it for a platform I used – PTW owners have something special here.

There’s a number of very minor discrepancies with the upper, contrary to assertions made on other reviews (not TRH), although nothing critical which cannot be tweaked.  I know the Angry Gun rail likewise has a number of small inaccuracies.

Ultimately, comparisons will always be drawn, but both products had different appeals, design intents and markets, and do their respective jobs admirably.  While a huge fan of what Angry Gun launched onto the L119A2 fandom market a year ago, as a designer I am likewise hugely impressed by what HAO have done here, it looks stunning.  Ultimately more attention to the replica L119 market is always a good thing, especially when it is as good looking as this.  It’s going to be interesting too seeing Rich’s build develop.

HAO’s L119A2 upper can be checked out, and bought, here.

They also provide a range of L119A2 accessories and parts separate from the main upper package.


Welcome to the Jungle

A few weeks ago a couple of pictures surfaced showing a mix of UKSF and regulars training in the jungle. The guys in the pictures appear to be predominantly UKSF.

Taranis Picture Template - Jungle A2 2

These features a number of A2s in rather interesting setups, different from the rather kitted out states we are used to seeing them in.

A couple had only flip up BUIS attached, with no LA-5s or optics, and paracord slings used – although to be honest some rather ghetto sling setups appear to be an enduring feature of UKSF setups, no matter how nice the kit they are issued. The rational for short rifles with no optics in the jungle is well established – they are less snaggable, well suited to short range engagements and the lack of optics reduces issues associated with high humidity. Also lurking in the pictures however is a much more conventional setup of LA-5 and ACOG. The L85 carried by a regular also uses just iron sights. If you’ve looked over my UKSF FAQ Vol 1, you’ll begin to see jungle setup weapons seem somewhat erratic still. These pictures show the first BUIS (although here they are the primary sights) used on A2s, and while Magpul MBUS Pro and MATech have been seen on L119A1s, atleast one of these appears to be a KAC 300m BUIS – it is hard to be completely definitive given the quality of pictures however.

Taranis Picture Template - Jungle A2 1

One L119A2 features a pace counter secured round the magwell, which has been seen before, and is just a manual counter of the sort used by doormen – available cheaply on ebay. These are used for navigating in the jungle.

Taranis Picture Template - Jungle A2 3

A final note on some of the kit on display, there appears to be a mix on MTP and multicam, with Taiga Jungle Uniform and a Patagonia L9 shirt among the stand out pieces of gear. Webbing appears to be used, and helmets on show are an Ops Core Carbon and Maritime, and a Virtus lid which presumably belongs to one of the regulars.

Many thanks to the person who originally shared the pictures for his permission to use them (I have cropped them and doubled down on the persec).  He didn’t want his name shared, and he subsequently pulled the pictures, so wanted anonymity when they were reposted.

Task Force Trident A40’s L119A1

This L119 build from Rich of Task Force Trident has been documented on the L119 Owner’s Club over its long, and sometimes arduous gestation.

It gets a full write up and thoroughly deserved feature on The Reptile House Blog.  The article is a great read, and the showcase of a thoroughly delivered replica is testament to the drive and attention to detail behind it.  Do check it out.

Rich’s journey with his build somewhat mirrors mine with my NGRS L119A1, and we both took similar routes with adding A2 uppers for a hybrid setup too.  Thankfully I dodged his nightmare experience with AMS, mine was slow, but nowhere near the trial Rich went through.  I’m sure it was an ordeal, but the quality of the build hopefully makes it worth it when all is said and done.

Well done to Rich on the excellent build, and I can only apologise for my previous recommendation of AMS – the work they did for me was great, but their behaviour with many others subsequent has been shocking.


Cohort Blog’s ITAS Ex Sentinel AAR: Parts 1 & 2

Go visit the Cohort Blog’s part one write up of ITAS’s mock CT event, Ex Sentinel, from the perspective of Chris, who runs Cohort Blog, and my team mate, Tom, from E27, who were both with the police contingent that event.  Part two is available here.

Needless to say it’s an engaging read and the quality of writing is high.  It certainly conveys a lot of the feel of these events too.

I didn’t make it to that event, but it chimes very much with my experience of ITAS CT events.


Reveal – L17A3 Grenade Launcher

Continuing the theme of covering the overhaul of the UKSF armoury, first with Glock 19s phasing out Sigs, then L119A2s replacing L119A1s, now we have the L17A3 (there may well be another rifle floating about too – but more on that another time). It is worth noting all the above have been used a while, and it is only comparatively recently that good reference material has come to light. It is hard to pin point the exact date things entered service, and indeed entering service does not necessarily mean wholesale adoption.

Taranis Picture Template - L17A3 4

SFSG training with L17A1s on L119A1 SFWs.

The L17A1, for those unfamiliar, is the underslung grenade launcher, manufactured by Heckler and Koch, which was fitted to the bottom rail of L119A1 SFWs – it is similar in concept and operation to the AG36 UGL. It has been in use since the early days of the L119 and the Afghan invasion, and represented the replacement of the M203 grenade launcher – the L17A1 in turn seems to have now been replaced, at least in part, by a new evolved variant. I saw textual reference to an L17A3 long before I’d seen a picture, which was pretty recently, but didn’t assign any particularly significance to it, indeed some ‘upgrades’ which warranted new ‘A’ numbers have been so outwardly inconsequential as to be near unnoticeable aesthetically. Recently however a mention of the weapon on a Facebook interest group, and later a picture, have clarified exactly what the weapon is.

Taranis Picture Template - L17A3 2

A US Service M320 Grenade Launcher.

The general trend in grenade launchers, most obviously seen by the US adoption of the M320 (made by HK under the commercial name GLM) launcher, is for smaller standalone launchers which can be carried and used independently of an assault rifle. This has numerous benefits in terms of flexibility and weight, cutting the weights of an individual’s weapon, which will reduce fatigue and in turn increase accuracy – this will I’m sure be especially important given the number of other accessories now fitted to individual weapons. Additionally, the weapon can be stowed in vehicles and packs, passed between team mates and holstered with much greater flexibility than was possible before.

Taranis Picture Template - L17A3 3

L17A1 slung by the side of an SFSG soldier.

Indeed, before the adoption of the L17A3, there is reference material showing the L17A1 slung as a standalone unit. It is not clear from the picture if the weapon is fired like that, or fitted to a rifle, however given it is slung handily from a belt, it suggests to me the weapon was used independent of any other system.

The L17A3 itself appears, in precis, to be an L17A1 with the stock and folding fore grip functionality of the M320/GLM.

The keen eyed will have noticed the feature picture accompanying this article is not in fact a photo of a L17A3, I am unable to share the photos of that which I have. The featured picture is a Photoshop mock up I produced using the reference for the L17A3, using an M320 picture as a base.  A number of precise details may not be perfect, the stock pad in particular, however this hopefully illustrates, broadly, what the L17A3 looks like and what grenade launcher is currently used by UKSF.

Review – Airsoft International’s Task Force Black L119A1 Build Guide

The L119A1 build guide accompanying the previously reviewed Airsoft International Task Force Black impression guide has been largely recycled from a previous issue, but there’s no great problem with that, since as a direct addendum to an article which references the L119A1, it is useful.

The problem however comes from the fact the L119A1 enjoyed a pretty decent time in service with UKSF, at a time of great development in weapon technology and accessories, so setups across that life changed markedly. The L119A1 featured in the article is not a Task Force Black setup – but this is not made clear. The L119A1 still has a ‘Task Force Black’ tag running across the top of the page, which suggests it is meant to be a Task Force Black setup.

Let’s put aside the super geeky things of the L119A1s idiosyncrasies in terms of front end cap, type of KAC rail, receiver profiles and buffer tubes – that’s too in depth for a mainstream magazine, they shouldn’t be looking to bog down in detail, so I’ll only assess if they get the main parts right.

They move from front to back across the weapon, so I’ll do the same.

Firstly they recommend a Madbull Surefire replica – which isn’t really a great choice given it’s a rather ropey clone, but they do correctly identify the mods needed to make it a little better. They also give a mention to the excellent Perr Mike suppressors which remain the best option for builds of the TFB era. Their advice on flash hiders is passable, they neglect to mention the Surefire birdcage which would be most correct for the TFB era, but do mention the 216A, which is correct for L119A1s, but too late for the TFB era (they also mention one is pictured on the opposite page, which is isn’t).

Taranis Picture Template - L119 Review 3

They generally get the barrel lengths right, and the method of achieving them. They then go on to mention the 10in L119A1s have standard M4 front sights but with the bayonet lug “generally” removed – this should be “always”. They do however differentiate between 10in and 16in front sights, therefore avoiding a common mistake made.

They generally get the KAC RAS correct, but for the few geeky details I will bypass, and although the KAC vert grip advice is correct, there were others used. The article doesn’t mention the other correct accessories for the front end, and here they should have mentioned the Surefire M600 torch and a PEQ box. The accompanying photo shows a PEQ-15, which isn’t correct – this should be either a PEQ-2 for earlier TFB setups, or a FDE LA-5 (distinguished by the railed adjustment dials).

For the lower receiver they somewhat muddy the waters by referring to the rifle being made by Colt Canada, while showing Diemaco trademarks. Personally if building a TFB era weapon I would go for Diemaco – certainly for an early one, although it is possible very late TFB/K era weapons might have been Colt Canada marked. Airsoft International also recommend Airsoft Machine Shop for doing the engravings here – this I believe is grossly irresponsible. While Airsoft Machine Shop produce excellent work, if sending a part to them for work you are odds on to lose it, or at the very least get it back about 6-12 months later after having had to harass them in the interim. They have left so many people out of pocket and lacking parts that to recommend them at all is really poor.

Pistol grip wise they identify correctly the Storm Grip (Stowaway Grip), however they then seem to go off on a tangent about Hogue Grips, which have been seen (albeit rarely) on much later L119A1s. A Hogue grip wouldn’t be correct for a TFB impression, and for some reason AI seem to think they represent a nightmare choice for AEG users – I am not sure why given Toysoldier have produced a trademarked rubberised Hogue Grip which will take an AEG motor.

Taranis Picture Template - L119 Review 1

Next they address optics. The article inform us the least contentious choice is an Eotech 552 – while it is not wrong to use an Eotech 552, the least contentious choice is certainly an ACOG TA01NSN. AI then move on to the ACOG, but state the TA31 is the model used, which is incorrect – UKSF haven’t been pictured with this variant, and it would be a weird choice for a TFB kit. The additional information on wing mounts, mini RDS sights and DIS iron sights is broadly correct however.

They then move onto the stock and butt pad, which they get broadly correct, although mention the CTR would be incorrect for TFB era as it is too modern – this is right, although it does beg the question as to what was going on with the rest of the article.

Finally, while not mentioned in the article, the pictured sling mount on the example is a knock off Magpul ASAP, which is not correct for TFB era, and the example pictured isn’t a particularly good replica anyway.

Mercifully though they sign off this article with links to Warlord Tactical, who make excellent replica parts for the L119A1, and the L119 Owners Club group on Facebook, which I run, and where a lot can be learned about the platform.

Review – Airsoft International’s Task Force Black Impression Guide

Introduction and Context

Volume 13, Issue 13 of Airsoft International features a write up of how to achieve a Task Force Black kit, with an accompanying guide to building a L119A1, the issue weapon of UKSF at the time.

For those that don’t know, Task Force Black was the name given to the UKSF deployment to Baghdad in GW2, whose task was hunting ex regime individuals and later jihadists. It changed name to Task Force Knight partway through its existence, and worked extremely closely with American special operations forces in the city at the time. It represented a wholesale change in how UKSF equipped itelf and the missions it undertook, and the meshing of operations and information and they fed into an extremely taxing workload of raids. The UKSF elements involved were primarily SAS, with support from Signallers, Med and EOD specialists, and backed up by 1Para, later formally stood up as SFSG.

Task Force Black kit is quite consistent, compared to earlier period, since each man was issued a huge bag of kit, so they weren’t wanting for much – and it was all the same. Usually the helmet, ancillary equipment, weapons and plate carriers were all pretty consistent. The camouflage however was an eclectic mix of British and US patterns, often mixed and matched together, under the more consistent base.

The above lends the kit a somewhat unique and very appealing look, and for some time it was the ‘go to’ kit for airsofters wanting to run UKSF impressions. It has been somewhat overtaken by modern UKSF impressions, but the appeal does endure. The issues with the kit are primarily based off the fact it was envisaged that it would be used for a few hours at a time, in short engagements, transported to the target by vehicle or aircraft. It is therefore bulky, heavy and ill suited to going prone – or indeed any other mission but a direct action raid. It was also intended to be used in a punishing series of raids, often nightly, for six months – the kit is durable and as such heavier than today’s kit which does a similar job. Modern kit, leveraging new technologies in a sector which at the peak of the Global War On Terror had a large amount of investment in R&D, is much lighter and able to do the same job with less bulk and weight. Additionally, if a lightweight bit of kit does break, with greater SOF budgets it is not as problematic to replace.

Modern UKSF kits are therefore better suited to a wider range of activities, will be more comfortable and lighter, and allow us to indulge our inner geardo. TFB kits are often stowed in the back of gear cupboards, but a lot of us still love them – especially those who started UKSF Impressions when these were the only game in town for a modern kit.

The Airsoft International article is therefore a way to propel the kit back into the thoughts of both impressionists and mainstream airsofters who might be curious about dabbling in the impression and milsim scene. In this the typically sharp graphic work and high visual production values of the magazine help – although what will really make or break it is the quality of the information imparted in the article.

The review will focus on the accuracy of the guidance given and information imparted, and won’t really address the often painfully bad spelling, grammar and often nonsensical sentence structure – which appears now to be back with a vengeance, after the issue had been largely eliminated for a year or so.

Where pictures have been taken to illustrate points, text and images which aren’t salient have been blurred, so I’m not reproducing material from the magazine as a whole, regardless of the worth of it.

Taranis Picture Template - TFB Review 3

Reasons for Review Article

I realise analysing an article in the way I am about to can be perceived as aggressive, and be taken personally, so I will outline my reasoning for doing so.

Airsoft International, as a hobby and industry magazine with journalistic articles, opinion pieces, and guides, is trusted by a large number of people, across the airsoft community. The fact something is in print and on a shelf suggests a degree of reliability and research has gone into its making, and the information within can be trusted as being solidly researched and delivered without undue bias. Lately – this has not been the case.

Those new to the hobby, or impressions, may well rely upon the magazine for information on how to build impressions, and while the article does recognise that it is not perfect, it does give a lot of information and advice which will lead people wanting to achieve the same look to go out and spend their hard earned money on achieving an impression. I think it is reasonable therefore to expect the information to be right, or where corners have been cut for cost or ease, to highlight this.

Indeed AI’s social media posts would have you believe they are the biggest and best airsoft publication about, so I do not think it unfair to dig a bit deeper into an article to see if these claims are justified. The motivation for doing so was the fact that a rather disastrous and misleading attempt at a MARSOC impression guide was published recently, so upon hearing a Task Force Black impression guide was going to be published, this piqued the interest of impressionists who have an interest in this era.

To clarify though, I have no bone to pick with Airsoft International personally, beyond the above belief they should adhere to the standards and quality of the sort of publication they purport to be, out of respect for their customer base. Indeed I was heavily involved in the last UKSF Impression article they published, the modern UKSF Counter Terrorism kit guide in collaboration with E27 found in Volume 12, Issue 12.

I understand AI has to operate in an industry which is under pressure, and cannot have expertise in absolutely everything, but a basic knowledge of the subject matter should be attainable, and there are people who will offer input and guidance on specific areas within the community for free or little cost – indeed E27 didn’t receive or ask any payment for the article they assisted with.

The number of errors in some articles is staggering, and a cynic might suspect that often these are not always the product of ignorance, but rather ensuring a substantial portion of the suggested kit purchases for an impression or setup are available from the magazine’s sponsors.

General Criticisms

The article kicks off with a bit of background information about what Task Force Black was, and this is a worthwhile approach, I always think it is vital when putting together kit to understand clearly who uses it, what their job was and what they used it for. The synopsis however seems somewhat meandering and could certainly have been trimmed into a punchier, more informative overview.

Next the piece moves onto a paragraph musing on the choice between DCU and CCU uniform cuts, before basically saying you can use whichever you like – certainly a lot of patterns and cuts were used, but again this could have been a lot less waffly and more focused.

Then, we have five paragraphs on the MICH 2000 helmet. Those looking to build a Task Force Black impression will be disappointed to find out that those five paragraphs neglect to actually tell you how to put together a TFB helmet setup. The bulk of the section is devoted to the history and various models of the MICH – which wasn’t actually used by UKSF who instead used the Gentex TBH-II available at the time (not to be confused with its modern iteration). Often however replica MICH 2000s are used as TBH-II stand ins, since they are near identical. The varied paint jobs of TFB lids, the helmet covers they sometimes used, and the distinctive ‘choc-block’ counter weights are not mentioned, while the similarly ubiquitous and identifiable PVS-21 mounts also get scant mention.

Taranis Picture Template - TFB Review 4

We next encounter another paragraph on the history of DCU and CCU – because the first obviously left us wanting more.

Then we’re onto the RAV. We’re informed a Flyye RAV has been used since real Paraclete RAVs cost £300-400. The price of RAVs fluctuates a lot, dependant on availability, and it has been between about £400 to as little as £70 at various points in the last few years – and while they might be listed on ebay for substantial prices, I very much doubt they sell for that. The Flyye RAV is apparently £205 from Military 1st – I would be surprised however if you couldn’t get a real Paraclete RAV on the forums or ebay for around £200 with abit of patience.

Taranis Picture Template - TFB Review 6

It is also worth noting a fact which wasn’t completely made plain that while the Flyye effort isn’t a terrible replica, it has notable differences. Most obviously it is olive green rather than Smoke Green, like the Paraclete original. Additionally the Velcro on top isn’t properly interfaced with the shoulder elements, and the zip is green rather than black. It would certainly pay to go for a real RAV, considering the sizable cost of the replica – advising otherwise appears to benefit no one but Military 1st.

Taranis Picture Template - TFB Review 7

Then onto pouches, which for the kit should be primarily Blackhawk Industries molle pouches in Olive Drab – instead the article advises using Flyye patches in OG (they say Smoke Green is more accurate – but here they seem to have got mixed up with the RAV). Given the cost of the Flyye pouches, I am certain real Blackhawk is now very much cheaper on the second hand market. This section should have advised that, and cautioned against the Blackhawk versions using speed clips, but instead it again went for an easy option which benefits a sponsor. The example RAV also features a rather strange pouch setup which would make shouldering a rifle problematic, and is unlike anything I have seen in reference pictures. This feature really should have looked at the real products, common setups, differences between the RAV and RMV to help readers avoid common mistakes.

They correctly identify that the Serpa adaptor they show is the wrong type, but note, quite rightly, the real thing here is hard to source and commands a pretty substantial price.

Taranis Picture Template - TFB Review 5

Finally things are rounded out with another paragraph giving a brief history of ACU – because why not. A last box listing products used suggests 99% were available from Military 1st, which mathematically is not nearly the case. The accompanying L119A1 feature which follows will be reviewed in a follow up article.

For clarity I am not suggesting Military 1st  directly influenced the writing or content of the article (I like the company and order from them semi regularly), I believe that to be the responsibility of AI.  It just seems the magazine took the easy option in putting forward information that benefits a sponsor over the reader.

Reference Criticisms

Task Force Black is one for the few eras in UKSF history about which a substantial amount is known publicly. The book Task Force Black by Mark Urban details a great deal of what went on at the time, and the number of leaked pictures from the era is sizable. Therefore lack of reference material should be little impediment to a TFB impression, indeed the article features sixteen real reference pictures supporting it. Unfortunately of the sixteen photos accompanying the article, two are of Delta Force, two are of SFSG, two are of airsofters and one is of SEALs.

Taranis Picture Template - TFB Review 8

This immediately misleads readers, and given the huge amount of reference material the issue can’t be availability. I can only assume lack of research.

Copy Error, Paste Error

One of the increasingly irksome things about Airsoft International is that the magazine is increasingly dominated by advertisements – and most insidiously, advertisements masquerading as articles. This would be more forgivable if the guides and information that aren’t directly related to selling the products of sponsors were of good quality and original.

Taranis Picture Template - TFB Review 2

This is sadly not the case – the aforementioned MARSOC article in a previous issue contained a few prominent lines on the front of an article which were roundly mocked. This incongruous historical flourish may have been dismissed as simply as an unfortunate attempt at supporting context, but it suggested two things: Firstly a staggering lack of historical knowledge or ability to fact check before putting something into a magazine – Secondly a seeming lack of comprehension of how BC/AD dates work.

Everyone has an off day though, surely as photos of the lines juxtaposed with images of ancient Greek or Roman armour were circulated in the comments sections of Facebook posts the editor might just write off that little mistake and move on.

Alas not – the next month it has been copied and pasted, word for word, entirely uncorrected, into a prominent position in one of this month’s articles.

This seems to be outright disrespectful of the readership – recycling content a mere month after it first made an appearance, while getting it wrong. The intent of any publication should be to inform and entertain readers – not just fill space between ads.

Summary

Certainly I would encourage AI in the future, when putting together similar articles, to try and explore the possibility of having them compiled by someone who has at least a basic knowledge of the subject matter.

I would also say that while they obviously need to mention sponsors etc for commercial reasons, doing so in what is purportedly an article, not an advertisement, is misleading. This is especially the problem when the items they suggest be bought from said sponsor are often not correct, and nor in several cased are they cheaper than the correct option.

The magazine is slick, well presented and has a reputation in the community, but that is very fragile and a number of advert filled volumes replete with staggering amounts of filler and misinformation have knocked it – certainly it takes a lot more time to build a reputation than lose one.

If you follow the magazine’s guide, you will probably produce an Impression which is recognisably UKSF form the Task Force Black era. The major criticism though is that while recognisable, it will be some way off an accurate impression, and it won’t really save any money to counterbalance this inaccuracy. You may as well do it for the same cost and have the end product looking better and more accurate.